Fancy Flying
Fancy Flying is where you control your camera in addition to your character in order to do a wide variety of crazy tricks. Some are simple, and don't require much practice; others require precision and do take a lot of practice. However, they all involve methods to gain height in ways you might not have imagined, and can help you find all sorts of new things!
A player who is skilled in fancy flying is often called a Fancy Flyer.
How do you Fancy Fly?[edit | edit source]
The first thing to understand is how the angle of the camera affects the angle of your flight:
- Flying forward + camera up = flying upward
- Flying forward + camera down = flying downward
- Flying backward + camera up = flying downward
- Flying backward + camera down = flying upward
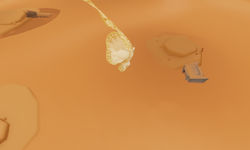
Even angling the camera up somewhat during normal flight can help you gain more height and distance. However, the primary key to fancy flying, is that flying downward will create a dive (shown to the right).
Now, in real life, birds and other creatures will dive in order to gain speed, and then the speed will help them to keep flying when they start flying upward, again. But in Journey, the game appears to keep track of the amount of time you spend diving - instead of true speed - and then compares it to how long you fly up.
It's this mechanic that players use - and often abuse - in order to fancy fly.
Newcomers would probably be best learning the Dive Boost, Charge Boost, and/or Dropshoot, first.
We try to provide video instructions WITH a visible controller (or representation thereof) to better help aid in learning.
Terminology[edit | edit source]
A "flap" is when your robe spreads like the wings of a bird. See Charge Boosting, where you fly against a wall and count the times how often your robe moves that way. The word is used to describe how long or often you press flying or keep on the flying button, could be used to describe distances etc.
"Pumping" is where you press the fly button at regular intervals, instead of holding it down.
List of Boosts[edit | edit source]
Solo Possible[edit | edit source]
- Dive Boost (DB) - Diving, then rising back up via momentum. The most basic of boosts.
- Reverse Dive Boost (RDB) - Dive boost with reversed controls.
- Slow Boost (SB/SDB) - A version of the dive boost where one doesn't fly directly toward the ground. Gives a greater boost.
- Flap Boost - A form of dive boost that involves a very subtle dive. Gives an incredible boost.
- Fish Boost - A technique where one maintains their Scarf power by chirping at Fish before rising.
- Level Boost - A technique where one doesn't put the camera all the way to the ground.
- Speed Boost - "
- Infinite Boost (IB) - A technique that allows to gain height without using scarf power.
- Goo Boost - Similar to the fish boost; recharging one's scarf in Goo before rising.
Note: The following are a lot easier with a White Cloak.
- Charge Boost (CB) - A technique where one gains "momentum" by running into a wall/vertical surface for some time.
- Reverse Charge Boost (RCB) - Charge Boosting with reversed controls.
- Dry Boost - Charge boosting without pressing the fly button; possible at certain dry-boost-points.
- Super Boost Charge Boosting with a stuck (closeup) camera. Only possible at certain places.
- Dropshoot (DS) - Gaining vertical momentum by flying with one's head on the ground.
- Chirp Dropshoot
- Reverse Dropshoot (RDS) - Dropshooting with reversed controls.
- Circle Dropshoot (CDS)
- Slow Dropshoot (SDS)
- Slow Circle Dropshoot (SCDS)
- Cave/Cutscene Boost - A technique which takes advantage of the camera being "stuck" in Headbonkers' Cave, or in/after cinematics.
- Infinite Flight (IF) - Technically a glitch and not a technique. Occurs when companion's game crashes in Broken Bridge, Underground, Tower or Paradise. Allows one to fly in Paradise (sometimes) and in Chapter Select (always) without spending any scarf power.
Companion Needed[edit | edit source]
Notes About Controls[edit | edit source]
- While a number of these are possible with a keyboard and mouse, or even a touch screen, it’s highly recommended to use a controller.
- It's also generally recommended to use the shoulder buttons (e.g.
 and
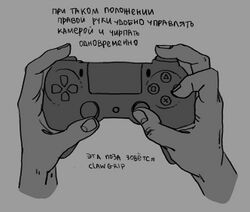
and  on PS controllers) for flying and possibly chirping. This is because, if you stuck with the basic/default controls, flying, chirping (which is used for some techniques) and controlling the camera would all use the right thumb. By using the shoulder buttons instead, you can dedicate that thumb to controlling the camera. However, depending on your situation (controller, hand size, etc.) you might find it easier to use the ‘claw method’ (shown to the right), or something similar.
 - Sixaxis: In some cases (playing on any PS platform, for instance), you can move your camera with just moving your controller. This can make boosting very hard, because you need to hold your controller very still - on the other hand, it can be helpful for better controlling the camera. If playing on a Playstation platform, you might consider getting a controller without sixaxis or disabling it somehow. If playing on PC, it might be harder to get something like Sixaxis working in the first place; so on this front, it has an advantage, especially for newcomers.
- Some PS4 players will remap their buttons
- The PC version allows you to remap your controls within the game. However, the option to use the shoulder buttons wasn’t added until v1.47
- The camera controls can be adjusted/inverted in the game preferences, and the left and right sticks can be swapped, too. However, many guides assume you’re using the default controls on a standard controller. With that in mind "right-stick
 up" means "camera up," while "right-stick
  down" means "camera down"; and at the same time "Left-stick
  up" means "move/fly forward" while "left-stick
  down" means "move backward/toward the camera." Be sure to adjust for whatever control scheme you use, as much as you can. (Not all changes are possible on a keyboard + mouse, let alone a touchscreen.)
- Note that there's no built-in way to invert the Sixaxis controls.
- A number of boosts require precise control. If you're using a controller on PC (or are willing to connect your controller to the PC while playing on console/mobile), you might want to use something like https://gamepadviewer.com/ and keep it open near your game window. This can give more-specific feedback than the camera + character movements, alone, which could be especially helpful for newcomers.
- It also helps to use the same model of controller throughout your practice. If you use a different controller, which has different sensitivity, then it can really mess with your muscle memory.
Notes About the Camera[edit | edit source]
- Because the camera angle is important to boosting, anything that causes your camera angle to level out could potentially ruin - or even completely negate - your boost. See the Video tutorials section of this page for a guide on common boosting mistakes (and how to avoid them).
- The PC version has been known to have all sorts of camera problems throughout the different versions and patches. Because of that, a number of fancy flying tricks may be difficult, or even impossible to pull off. If the a particular version isn’t mentioned in a boost page, it may be possible, but it probably hasn’t been tested - or at least confirmed - yet.
- Similarly, because the iOS version only allows so many inputs at once, many tricks are inadvisable on a touchscreen - it's recommended to try using a controller instead, though some players have still reported problems with this type of setup.
- It’s worth repeating that many guides assume you’re using the default, controller-based camera controls. Be sure to know what the guide is asking you to do (right-stick
 up = camera up; right-stick
  down = camera down), and try to adjust accordingly, if needed, and as much as possible.
Video Tutorials[edit | edit source]
While many tutorials are specific to certain kinds of tricks, here are some that cover boosting in general, or a variety of basic techniques.
If not explicitly mentioned, the video covers both PS3 and PS4 consoles, probably PC, and possibly mobile.
Basic Boosting Techniques[edit | edit source]
This video explains the three basic boost methods. CAPTIONS REQUIRED (EN + JN + auto translate).
Various Boosting Techniques[edit | edit source]
Various Boosting Tips[edit | edit source]
CAPTIONS REQUIRED for the following two videos (EN + JN + auto translate).

